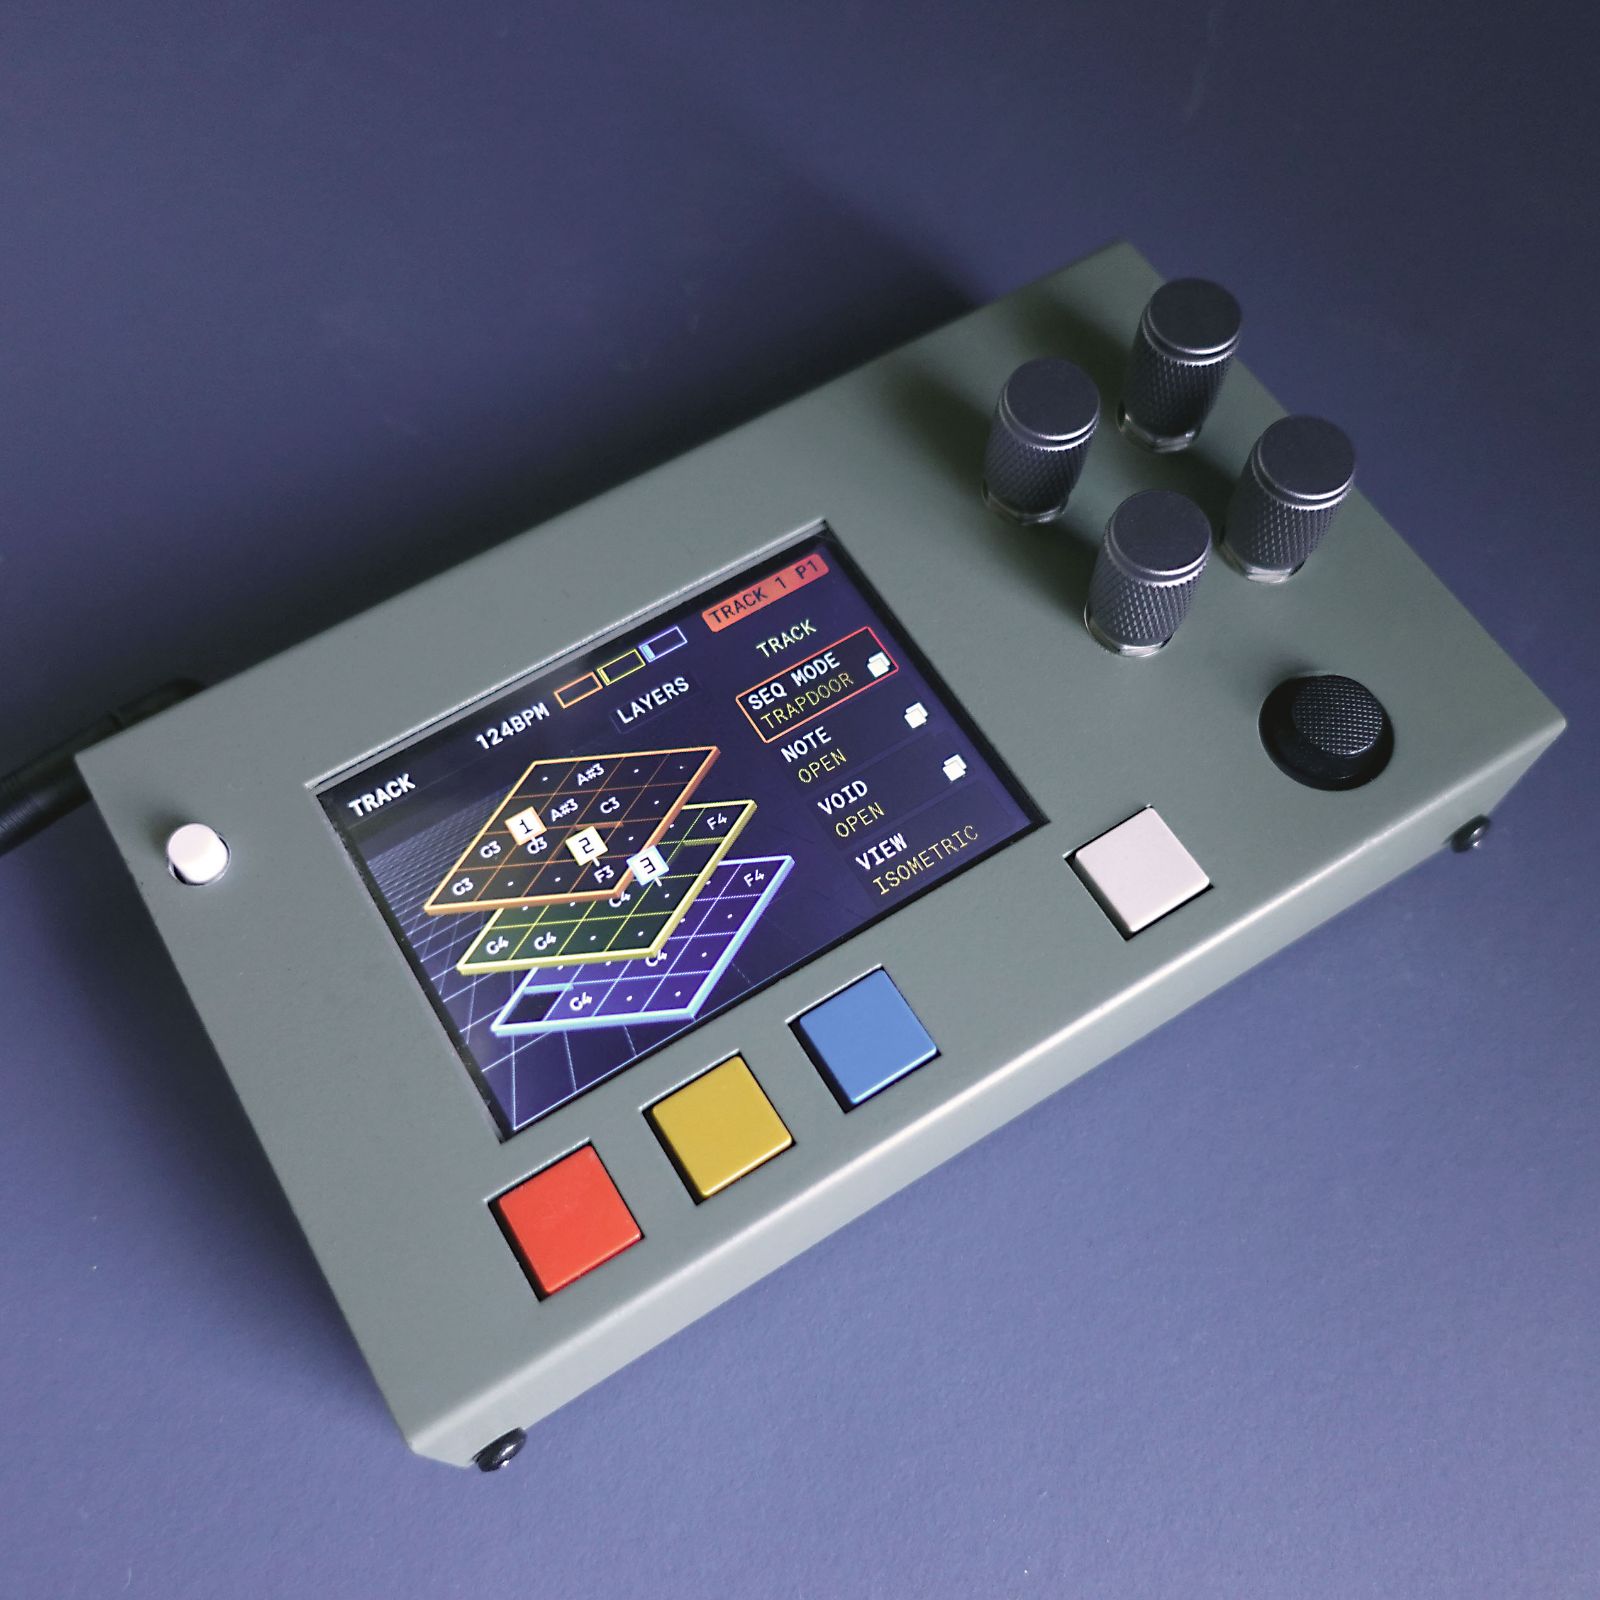
Synthesis Technology
User Manual

ADEPT

ADVANCED DIGITAL EVENT PROCESSING TIMELINE

Firmware1.40
Revised22 July 2026

A practical guide to creating tracks, running three playheads, recording MIDI and CV, shaping patterns, routing instruments, and performing complete arrangements.

Official ADEPT manualFirmware 1.40
Manual map

What's inside

Start with chapters 1 and 2, then go directly to the track or performance tool you want to use. TRACK / KEYS, DRUM, and MODU each have their own chapter.

1

Start Here

The four encoders

On the Piano Roll, they normally work like this:

Control Usual job
EncA Choose the track.
EncB Choose and edit the right-side menu item.
EncC Move up and down through notes or drum rows.
EncD Move left and right through steps.

Buttons and touch

Control What it normally does
Orange, Yellow, Blue Start or stop the matching playhead.
Hold Orange, Yellow, or Blue Open that playhead's settings.
Hold White and press a coloured button Start recording into that playhead.
White Open, confirm, close, or go back, depending on the screen.
Joystick Move through work areas, rows, cards, or grids.
Touch Select and edit visible notes, cards, cells, names, and controls.

Make your first pattern

  1. A track is ready when you begin. Touch empty steps to add notes or hits.
  2. To add another track, short-press White on the Piano Roll. In TRACK MENU, first turn the Orange, Yellow, and Blue target boxes on or off.
  3. Choose KEYS, DRUM, or MODU to create the track for those playheads.
  4. Press Orange, Yellow, or Blue to start a playhead.
  5. Navigate to the PROJECTS page and save when you want to keep the result.

The same popup also contains CLEAR, DELETE, and COPY:

  • CLEAR empties the current track but keeps the track.
  • DELETE removes the current track.
  • COPY copies material using the choices shown in the next screen.

ADEPT asks for confirmation before clearing or deleting.

Set the tempo

Touch the BPM value in the top bar, turn EncB, then touch the page name to leave tempo editing.

ADEPT Firmware 1.40Chapter 1 of 22
2

Moving Around ADEPT

The Piano Roll and its work areas

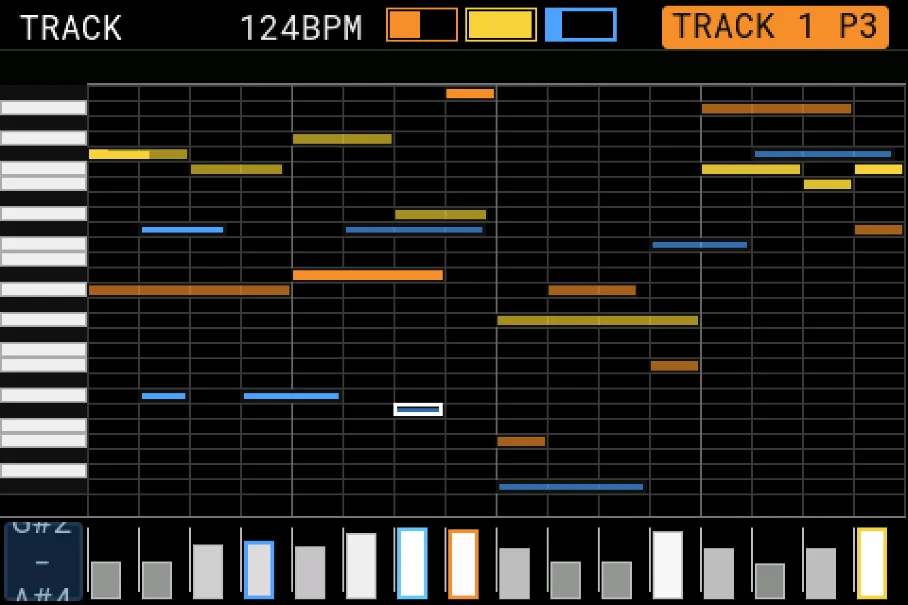
The Piano Roll is the main editing surface.

Push the joystick left or right to move through these work areas. The current name is shown at the top of the screen:

TRACKGENERATORMODIFIERGROUPSXPLAYPROJECTSMIDI ROUTERSYSTEM

Work area What you use it for
TRACK Edit the selected track. KEYS, DRUM, and MODU each show their own controls.
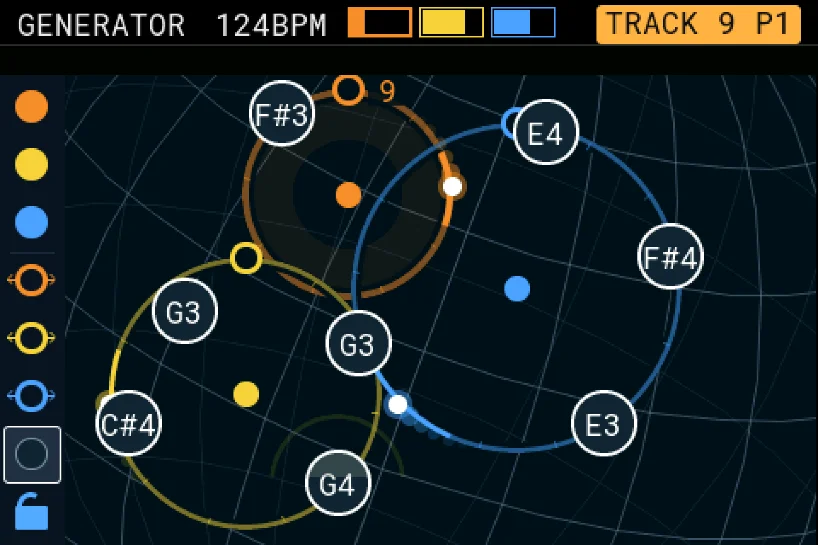
GENERATOR Create KEYS patterns, DRUM patterns, or MODU curves.
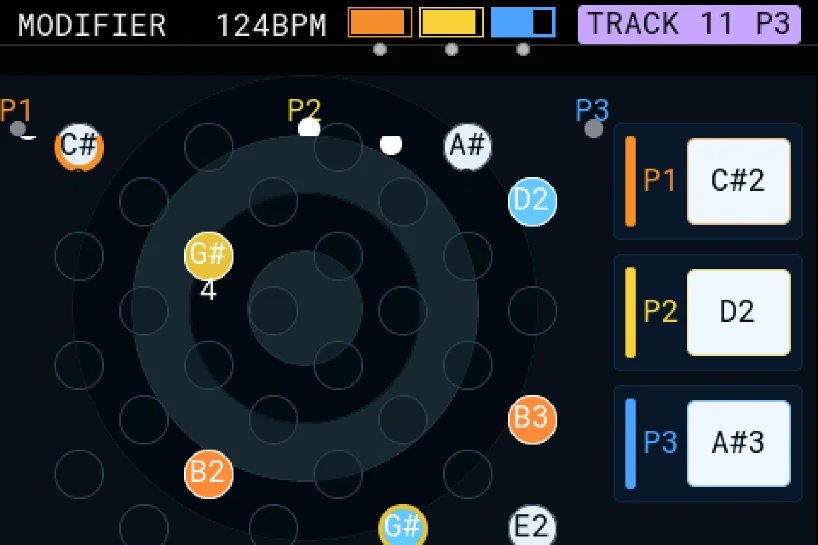
MODIFIER Change notes, rhythm, timing, loudness, or control movement while the track plays.
GROUPS Put several tracks under one performance control.
XPLAY Open Conductor, Transition, Crossfade, Live Play, Arrange, and Mix.
PROJECTS Name, save, load, clear, or start projects.
MIDI ROUTER Connect MIDI and CV inputs to outputs, filter them, and arrange route changes.
SYSTEM Set CV standards, DIN sync, display brightness, storage, and calibration.

In MIDI ROUTER, short-press White to cycle between TRACKS, WIRING, and the step-routing grid. If the MIDI Filter is open, White closes it.

Use EncA to select a track. The TRACK page edits the selected track, and its functions change to match KEYS, DRUM, or MODU.

Zoom the Piano Roll

Gesture Result
Hold EncD and turn it Change how many steps are visible.
Hold EncC and turn it Change how many note rows or drum rows are visible.
Press EncC and EncD together Fit the Piano Roll around the notes or hits. Press them together again to return to the normal view, which shows up to 16 steps.

Zoom changes only what you can see. It does not change the notes, hits, track length, or playhead length. While a zoomed pattern is playing, the visible step area follows the active playhead.

ADEPT Firmware 1.40Chapter 2 of 22
3

TRACK / KEYS

What it is

KEYS stores pitched notes. Use it for melodies, chords, bass lines, and any other part that needs musical pitch.

Create and edit notes

  1. To add another KEYS track, short-press White and choose KEYS.
  2. Touch an empty position to add a note.
  3. Touch an existing note to remove it.
  4. Use EncC for pitch and EncD for step movement when using the cursor.

Orange, Yellow, and Blue can read the same notes with different lengths, directions, speeds, and outputs. For example, Orange can play a 16-step bass phrase while Yellow reads the same notes backwards over 12 steps.

Name a KEYS track

  1. Select the KEYS track with EncA.
  2. Hold White for about half a second.
  3. Enter a name in TRACK NAME and choose SAVE.

KEYS TRACK controls

Select the KEYS track with EncA and move to TRACK. Use the joystick up/down to highlight a row. Turn EncB to change a row that has one value. Press EncB on DYNAMICS, LFO MOD, CROSS MOD, or CONDITION to open its settings. Inside that screen, use the joystick up/down to choose a setting and turn EncB to change it. Choose BACK when finished.

Row What it does Example use
PLAYHEAD Chooses Orange, Yellow, or Blue for playhead-specific edits. Give each playhead a different loop length.
LENGTH Sets the selected playhead to 1–32 steps. Run a 12-step line against a 16-step line.
SWING Pushes the offbeats later. Turn a straight rhythm into a shuffle.
CONDITION Decides which loops or performance situations allow a step to play. Play a fill only every fourth loop.
DYNAMICS Opens gate, velocity, probability, and program-change settings. Make a note shorter, softer, or less frequent.
LFO MOD Repeatedly moves a chosen track setting. Slowly vary velocity or gate.
CROSS MOD Lets movement on this track affect another track. Use one rhythm to change another track's probability.
NOTE SHIFT Moves the selected playhead's note pattern left or right by one step. Start a bass phrase one step earlier or later.

DYNAMICS contains:

Field Purpose
GATE Changes how long the current step is held.
VELOCITY Changes the note's loudness or force.
PROB Sets the chance that the step plays after its condition has passed.
PROG CHG Chooses a MIDI Program Change value.

These are step settings. Move to the note with EncD, open DYNAMICS, choose the setting with the joystick, and turn EncB. Move to another step with EncD when you want to edit a different note.

Track LFO

Track LFO repeatedly changes one setting on the selected coloured playhead. It does not add or remove notes.

Field Choices / purpose
SHAPE SQUARE, SINE, TRI, or S/H.
DEPTH Sets how strongly the LFO moves the target; zero turns the movement off.
SPEED 4X, 2X, 1X, 1/2, 1/4, 1/8, or 1/16.
TARGET VEL, PROB, CC, GATE, or PC.
CC Chooses the controller number when TARGET is CC.

Use Track LFO for a regular rise and fall in loudness, gate, chance, MIDI CC, or program value. DRUM has the same Track LFO choices.

Cross Mod

Cross Mod uses the changing values on the current KEYS track to change another track while both play.

Field Choices / purpose
SOURCE CC, VEL, PROB, GATE, or CV: the movement read from this track.
TARGET OFF, CC, VEL, PROB, GATE, or CV: the setting changed on the other track.
TRACK Chooses target T1–T12.
MODE MIRROR follows the source movement; INVERT moves against it.
AMOUNT Sets the strength; zero shows OFF.

For example, use the source track's velocity to raise another track's probability, or invert a gate movement to make two parts trade space.

Conditions

A condition tells a step when it is allowed to play. The condition is checked first; PROB is checked afterwards.

To set one, move to the required step with EncD, open CONDITION, and turn EncB until the required name is shown. Repeat this for any other steps that need their own condition.

Condition Plain meaning
--- Always. This is the normal setting.
1:2 to 2:2 Play on the chosen pass in a two-loop cycle.
1:3 to 3:3 Play on the chosen pass in a three-loop cycle.
1:4 to 4:4 Play on the chosen pass in a four-loop cycle.
1:8 to 8:8 Play on the chosen pass in an eight-loop cycle.
1ST Only on the first loop after the playhead starts.
!1ST On every loop except the first.
FILL Only while Fill is active.
!FIL Only while Fill is not active.
PRE Only if the previous conditioned step played.
!PRE Only if the previous conditioned step did not play.
NEI Play if the previous-colour playhead fired the same step: Yellow follows Orange, Blue follows Yellow, and Orange follows Blue.
!NEI Play if that previous-colour playhead did not fire the same step.
MOD Play when the selected Modifier fires.
!MOD Play when the selected Modifier does not fire.

The exact on-screen order is:

---, 1:2, 2:2, 1:3, 2:3, 3:3, 1:4, 2:4, 3:4, 4:4, 1:8, 2:8, 3:8, 4:8, 5:8, 6:8, 7:8, 8:8, 1ST, !1ST, FILL, !FIL, PRE, !PRE, NEI, !NEI, MOD, !MOD.

When MOD or !MOD is selected, open its detail page to choose:

  • MOD SOURCE: THIS or another track.
  • SOURCE MOD: Modifier slot A, B, or C on that source.
  • MOD TARGET: optionally fire slot A, B, or C on this track when the condition passes; use OFF if the condition should only decide whether the step plays.

Conditions belong to KEYS and DRUM. MODU uses STATES instead.

Record a KEYS part

Set INPUT, CHANNEL, REC MODE, and REC Q in the coloured playhead menu when you first prepare it for recording. ADEPT remembers this setup after power off. Change it only when you want to record from a different source or in a different way.

  1. Hold White and press the coloured playhead button.
  2. Play the external keyboard or sequencer.
  3. Press the coloured button again to stop recording.

Good uses

  • Run a 16-step bass line on Orange and a 7-step counter melody on Yellow.
  • Put a chord on the first loop only with 1ST.
  • Use FILL on a turnaround note that Conductor or a live fill can reveal.
  • Use POLY in Generator for ready-made harmony, then edit individual notes by touch.
ADEPT Firmware 1.40Chapter 3 of 22
4

DRUM

What it is

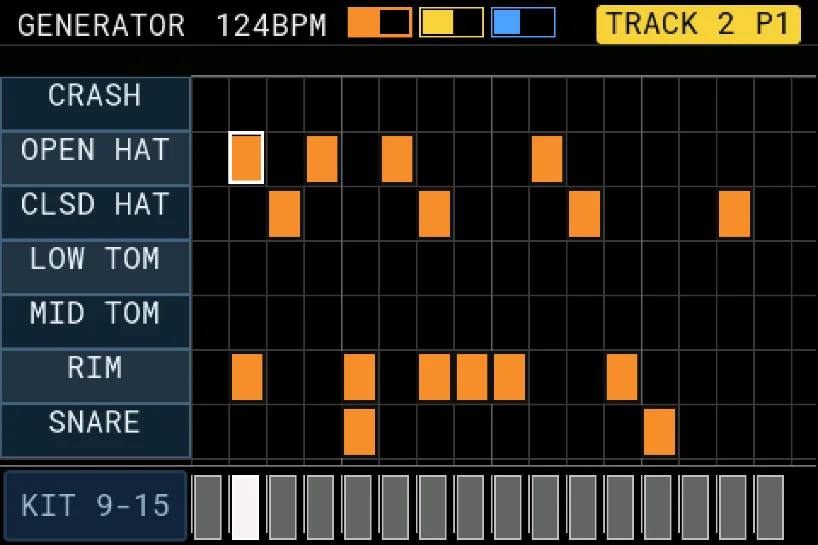
DRUM stores up to 16 drum parts in one track. Eight rows are visible at a time. A row can be a kick, snare, hat, percussion sound, or any other sound triggered by a MIDI note.

Create and edit hits

  1. To add another DRUM track, short-press White and choose DRUM.
  2. Touch steps to add or remove hits.
  3. Turn EncC to scroll through the drum parts when using the cursor.

DRUM TRACK controls

Select the DRUM track with EncA and move to TRACK. Use the joystick up/down to highlight a row. Turn EncB to change a row that has one value. Press EncB on DYNAMICS, DRUM MAP, LFO MOD, or CONDITION to open its settings. Inside that screen, use the joystick up/down to choose a setting and turn EncB to change it.

Row What it does
PLAYHEAD Chooses Orange, Yellow, or Blue.
LENGTH Sets that playhead to 1–32 steps.
SWING Pushes the offbeats later.
CONDITION Gives hits loop, fill, neighbour, or Modifier conditions.
DRUM MAP Chooses a drum part and its MIDI note.
DYNAMICS Opens gate, velocity, probability, and program-change settings.
LFO MOD Moves a track setting repeatedly.
NOTE SHIFT Moves the selected playhead's hit pattern left or right by one step.

DYNAMICS and CONDITION apply to the step under the cursor. Move through the pattern with EncD, then edit the selected step in the same way as on a KEYS track.

Name a DRUM track

  1. Select the DRUM track with EncA.
  2. Hold White for about half a second.
  3. Enter a name in TRACK NAME and choose SAVE.

Drum Map

Open DRUM MAP to edit:

Field Purpose
LANE Select one of the 16 drum parts.
NOTE Set the MIDI note that plays and records that part.

Mute, solo, move, and rename drum parts

Action Result
Tap a drum label Mute or unmute that part. A muted label is red and begins with M.
Long-press a drum label Solo that part and remember the earlier mute setup.
Long-press the focused part again Restore the earlier mute setup.

To move a row:

  1. Put the cursor on the required drum row.
  2. Turn EncD left past the first step to focus the drum label.
  3. Press EncD to pick up the row and open its sidebar.
  4. Turn EncC to move the row.
  5. Press EncD again when it is in the required position.

The picked row's sidebar contains MIDI NOTE and RENAME. Move between them with the joystick. Press EncB on MIDI NOTE, then turn EncB to choose the outgoing note. Press EncB on RENAME to open the naming keyboard.

Record drums

The playhead recording settings are remembered after power off. To make a take, hold White and press the coloured playhead button, play the drum part, then press that coloured button again to stop.

If the drum input has not been prepared yet, hold that coloured button and set its INPUT, CHANNEL, REC MODE, and REC Q once. Chapter 6 explains those choices.

Good uses

  • Give the kick a 16-step Orange loop and percussion a 15-step Yellow loop.
  • Put a snare fill on 4:4 so it appears only on the fourth pass.
  • Use Drum Generator variations to move between a main beat, breakdown, and fill.
ADEPT Firmware 1.40Chapter 4 of 22
5

MODU

What it is

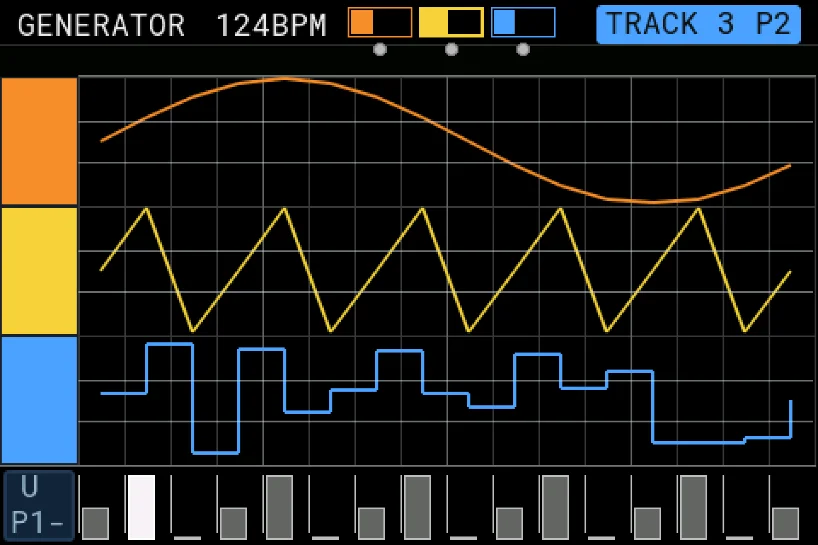
MODU stores changing control values instead of notes or drum hits. You can draw a curve by touch, record one from CV IN, or create one with Generator. Orange, Yellow, and Blue each have their own row, and each row can be 1–32 steps long.

Use MODU to create reusable modulation shapes and to trigger actions with STATES.

MODU TRACK controls

Select the MODU track with EncA and move to TRACK. Use the joystick up/down to highlight a row. Turn EncB to change PLAYHEAD, LENGTH, or MODE. Press EncB on LFO MOD or STATES to open its settings. Inside that screen, use the joystick up/down to choose a setting and turn EncB to change it.

Row What it does
PLAYHEAD Chooses the Orange, Yellow, or Blue MODU row.
LENGTH Sets that row to 1–32 steps.
LFO MOD Adds a repeating shape to the stored curve.
MODE Chooses RUN or FREEZE for the picture on screen.
STATES Runs an action when the curve enters its low, middle, or high area.

Draw a curve

Touch drawing writes values into the coloured MODU row. Recording must be active on that colour before the row accepts drawing.

  1. Select the MODU track and coloured row.
  2. Hold White and press that coloured playhead button to start recording.
  3. Touch anywhere inside that coloured row. The height of your finger sets the value at that step.
  4. Drag left or right to draw across more steps. ADEPT joins the touched points so the movement is continuous.
  5. Release, then stop recording when the pass is complete.

Only the steps touched or crossed by the drag are changed. The rest of the curve remains in place.

Record an external CV curve

  1. Patch the modulation source to CV IN.
  2. Set the row length from LENGTH on the MODU TRACK page.
  3. Open the coloured playhead menu, set INPUT to CV, then choose REC MODE.
  4. Hold White and press the coloured playhead button.
  5. Let the playhead complete the pass while the external voltage moves.
  6. Stop recording.

The playhead recording setup is remembered after power off, so you only need to change it when the next recording needs a different setup.

Add MODU LFO movement

Use LFO MOD when the stored curve needs an extra repeating movement. The curve remains stored; the LFO changes the result while it plays.

Field Values
SHAPE SQUARE, SINE, TRI, S/H
DEPTH 0–127; zero is OFF
SPEED 4X, 2X, 1X, 1/2, 1/4, 1/8, 1/16
POL NORM, INV

POL set to INV inverts the polarity.

RUN and FREEZE

RUN moves the curve picture with the playhead. FREEZE holds the picture still so it is easier to inspect.

FREEZE does not stop the MODU row. Its output, LFO, Modifiers, and STATES continue working.

STATES

STATES divides the curve into three easy areas:

  • BOTTOM: the low part of the curve.
  • MIDDLE: the middle part.
  • TOP: the high part.

An action runs when the moving curve enters an area. It does not run continuously while the curve stays there.

Open STATES, turn it on, select a STATE, then choose its ACTION:

ACTION Extra choices Result when the curve enters the area
NONE None Do nothing.
MIDI ROUTE MIDI OUT DIN1–3 or USB1–3; CHANNEL 1–16 Change the route to the selected MIDI output and channel.
CV PORT CV OUT CV1 or CV2 Change the route to the selected CV output.
MOD FIRE MOD SLOT A–D Fire the selected Modifier slot.

Set BOTTOM, MIDDLE, and TOP separately.

Mute and focus MODU rows

Action Result
Tap a coloured MODU label Mute or unmute that row.
Long-press a MODU label Focus it and mute the other MODU rows.
Long-press the focused label again Restore the earlier mute setup.

MODU Generator

Generator can write these shapes:

RAMP UP, RAMP DOWN, TRIANGLE, SINE, RANDOM WALK, EXP RISE, EXP FALL, STAIRCASE, CV BURST, STEP RNDM, ENVELOPE, and S&H.

Row What it changes
GENERATE Writes the curve using the current choices.
MODE Chooses the kind of curve.
AMPLITUDE Sets how far the curve moves from low to high.
OFFSET Moves the whole curve higher or lower.
SMOOTH Softens sharp changes between steps.
CURVE Changes the bend of rising and falling shapes.
CYCLE Sets how often the shape repeats across the row.
PHASE Moves the starting point of the shape.
VARIANT Creates a related version of the same setup.

ENV appears in ENVELOPE mode. Open it to set ATTACK, DECAY, SUSTAIN, and RELEASE.

If ADEPT shows STOP TO GEN, stop playback and press GENERATE again.

MODU Modifiers

MODU has five curve-focused Modifier types:

Type What it does
CV OFFSET Moves the whole curve higher or lower.
CV SCALE Makes the curve's movement smaller or larger.
CV INVERT Turns high values into low values and low values into high values.
CV QUANTIZE Snaps the curve to a chosen number of levels.
CV WAVEFOLD Folds values back into the range for more complex shapes.

Good uses

  • Record an external LFO once, then reuse it without the external module.
  • Draw a curve, then add LFO MOD to animate it.
  • Use BOTTOM for one MIDI route, MIDDLE for another, and TOP to fire a Modifier.
ADEPT Firmware 1.40Chapter 5 of 22
6

Playheads and Recording

Three playheads, one timeline

Orange, Yellow, and Blue are independent playheads. Each can have its own length, direction, speed, input, output, and recording choices.

This is one of ADEPT's main performance ideas: the same notes can be read in three different ways at the same time.

Open a playhead menu

Hold Orange, Yellow, or Blue. Push the joystick up/down to choose a row and turn EncB to change its value. Press EncB on BACK to close the menu, or on CLEAR to open its confirmation.

Menu item What it does
BACK Closes the menu.
PLAYHEAD Chooses Orange, Yellow, or Blue.
PLAY MODE Chooses NORMAL, METRICAL, STOCHASTIC, RANDOM, CALL&RESP, or COMPOSE. The last two use the Conductor engine described in Chapter 11.
DIRECTION FORWARD, REVERSE, or PINGPONG.
CLOCK DIV x16, x8, x4, x2, 1, 1/2, 1/4, 1/8, or 1/16.
CLOCK SRC Internal clock, another playhead, or trigger input: INT, P1, P2, P3, TRIG.
OUTPUT P1, P2, P3, CV2, or CV1.
CHANNEL OMNI or MIDI channel 1–16 where MIDI is used.
REC MODE OVERDUB, LOOP ERASE, or LOOP.
REC Q 1/1 to 1/32, or NO Q.
INPUT AUTO, DIN1–3, USB1–3, or CV.
REC LOOPS Sets the recording loop count from 1–8.
PASS THRU Hear matching incoming notes without recording them.
HUMAN Adds controlled timing looseness; OFF disables it.
NOTE DIM Sets how dim idle notes look. Sound is unchanged.
FADE Sets how slowly a played note fades back to its idle brightness. Sound is unchanged.
MASTER Makes this playhead follow another coloured playhead's start and stop. MANUAL removes the link.
LOOP Q Chooses when a linked action happens: next beat, bar, pattern, or a longer pattern count.
CASCADE Runs Orange, then Yellow, then Blue as one longer chain.
SEQUENTIAL Starting one coloured playhead stops the one that was running.
S/S FILTER Allows or blocks incoming and outgoing MIDI Start/Stop: NONE, IN, OUT, IN+OUT.
SCROLL/SPLIT Follow the moving roll, or use fixed 16-step pages for long patterns.
STEP NUMS Shows or hides the cursor's note and step bubble.
CLEAR Clears notes for the selected playhead context after confirmation.

Viewing patterns longer than 16 steps

Open a coloured playhead menu and set SCROLL/SPLIT:

Choice What the screen does
SCROLL The visible Piano Roll follows the active playhead as it moves through the longer pattern.
SPLIT The roll stays on fixed 16-step pages. It shows 1–16, then switches to 17–32 when the playhead enters the second page.

For a pattern of 16 steps or fewer, both choices show the same part of the pattern. This setting changes only how the pattern is shown; it does not change its length or timing.

NOTE DIM and FADE

These two playhead settings make it easier to see which notes or drum hits have just played. They affect only the display.

Setting What it does
NOTE DIM Sets how much the resting notes are darkened while the playhead runs. 0% leaves them bright; 80% gives the strongest dimming.
FADE Sets how long a played note takes to return to its dim level. Choose 1–7 STEPS; 0 turns the fade off.

Set them separately for Orange, Yellow, and Blue if you want the three playheads to leave different visual trails. Neither setting changes MIDI, CV, velocity, gate, or note length.

Recording modes

Mode Use it when...
OVERDUB You want to add notes to what is already there.
LOOP ERASE You want the moving record head to erase and replace material.
LOOP You want to capture one loop, then hear it repeat.

REC Q moves recorded notes onto the chosen timing grid. Choose NO Q when you want to keep the timing you played.

Record several channels from one input

Set all three playheads to the same INPUT, then give them different CHANNEL values. For example, Orange can record DIN1 channel 1, Yellow DIN1 channel 2, and Blue DIN1 channel 3.

PASS THRU

When PASS THRU is on, notes matching the selected INPUT and CHANNEL go straight to the selected OUTPUT. This is for monitoring and live playing. It does not write notes until recording is armed.

ADEPT Firmware 1.40Chapter 6 of 22
7

Generator

What it is

Generator creates a pattern from a small set of musical choices. It is useful for starting quickly, making variations, or creating material that you then edit by hand.

Open GENERATOR and select the track with EncA. Use the joystick up/down to choose a row and turn EncB to change it. Highlight GENERATE and press EncB when the setup is ready.

KEYS Generator

Row What it does
GENERATE Creates or updates the notes.
ROLE MOTIF, FOUNDATION, COUNTER, or BASSLINE. This changes the musical job of the part.
VOICES MONO creates one note at each onset. POLY can add up to two scale-aware harmony notes.
SCALE Sets the musical scale used by the main notes and POLY harmony.
DENSITY Sets how busy the pattern is.
VARIANT Chooses one of 100 pattern variations.
NEXT VARI Chooses which variation comes next, including RANDOM.
VARI LOOP Sets how many loops the variation plays; Vn SKIP skips that slot.
HIGH NOTE / LOW NOTE Sets the pitch range.
PLAY LOOPS / REST LOOPS Alternates playing and resting phrases.
LOOP OFFSET Starts that play/rest cycle at a different point.
NOTE SHIFT Rotates the notes by one step.

MONO is the normal single-note result. POLY keeps the generated main note and adds harmony where it suits the selected ROLE: MOTIF tends to support the tune from below, FOUNDATION builds upward, COUNTER moves around it, and BASSLINE adds harmony more sparingly.

DRUM Generator

Row What it does
GENERATE Creates or updates the beat.
STYLE POP, ELECTRO, HIPHOP, BREAKBEAT, DNB, IDM, HOUSE, TECHNO, EUCLID, or MOTORIK.
DENSITY Sets how busy the beat is.
VARIANT Chooses one of 100 beat variations.
NEXT VARI Chooses the following variation, including RANDOM.
VARI LOOP Sets how many loops the variation plays; Vn SKIP skips that slot.

Variation chains

KEYS and DRUM each have variation slots V1–V8. Give a slot a VARI LOOP value to use it. After that many loops, ADEPT moves to the next available slot and creates its variation. This can build a repeating verse/fill pattern without writing separate projects.

MODU Generator

See the MODU chapter for its shape modes and controls.

ADEPT Firmware 1.40Chapter 7 of 22
8

Modifier

What it is

A Modifier changes the pattern while it plays. The stored notes can stay simple while the result gains chords, repeats, movement, scale changes, accents, delays, or CV shaping.

There are three visible Modifier slots. Use one slot for a simple effect, or combine slots for a larger change.

Open and use it

  1. Open MODIFIER.
  2. Select the track with EncA.
  3. Turn EncB, or move the joystick up and down, to choose one of the three Modifier cards.
  4. Press EncB to open that card.
  5. Move the joystick up and down to choose a setting. Turn EncB to change it.
  6. Press EncB again to return to the three cards.

Touch a Modifier card to turn that whole slot on or off. A coloured card is on; a grey card is off.

For KEYS and DRUM, touch a step in the lower Modifier row to add the selected Modifier there. Touch the same step again to remove it. Up to three Modifiers can be placed on one step.

MODU Modifiers change the whole curve instead of being placed on individual steps. Touch their card to turn them on or off.

If Modifiers are new to you, start with one of these:

Type Simple first use
RATCHET Put repeated hits on one drum step.
TRANSPOSE Move one KEYS step up or down without moving the stored note.
ACCENT Make selected beats stand out.
HARMONIZE Add a harmony note to a KEYS part.
DELAY Add step-timed echoes.

Choose one card, set its TYPE, choose its coloured PLAYHEAD, then place it on one step. Once that works, add loop timing or turn GLOBAL on for a wider effect.

Shared rows

Row Purpose
TYPE Chooses the Modifier. The list changes for KEYS, DRUM, and MODU.
Named setting rows Set the chosen Modifier. The names change with TYPE; for example, RATCHET shows REPEATS while TRANSPOSE shows SEMITONES.
PLAY LOOPS Sets how many loops the Modifier is active.
REST LOOPS Sets how many loops it waits before becoming active again.
PLAYHEAD Chooses the Orange, Yellow, or Blue playhead.
GLOBAL Applies the Modifier without a placed marker when the type allows it.
BACK Leaves the detail menu.

Current KEYS Modifier types

Type What it can do
CHORD Turn one note into a chord; choose chord, strum, voices, and spread.
RATCHET Add repeated hits with spacing and velocity shape.
ARPEGGIO Play chord notes as an arpeggio with direction, octave, rate, and length choices.
TRANSPOSE / OCTAVE Move notes by semitones or octaves.
SHIFT Move playback by steps.
MUTE Silence the selected placed event or playhead while active.
LFO Repeatedly move another Modifier target.
SCALE MORPH Gradually pull notes toward another scale.
SCALE REGION Use different scales in low, middle, and high note ranges.
TIME WARP Stretch or compress the timing feel.
PHASE Offset playback position.
LOOP WINDOW Restrict playback to a smaller section.
JUMP QUANTIZE Make jumps land on a chosen step grid.
SCRUB Use CV1 or CV2 to move through the pattern.
STUTTER Make a short burst of repeats.
RHYTHM MASK Apply a ready-made rhythm shape.
HARMONIZE Add one or more harmony intervals.
SCALE FOLLOW Follow another source's scale setting.
VEL SPREAD Spread note velocities apart.
MUTATE Introduce note changes.
DEGRADE Remove or weaken material by an amount.
STABILITY Pull changing material back toward a steadier result.
KEY MIRROR Mirror notes around a chosen centre note.
FRAGMENT Repeat, bounce, or drift through a short section.
REORDER Shuffle, reverse, rotate, or groove a section.
SKIP Skip notes using a selected pattern.
ACCENT Add accents using a selected pattern.
SIDECHAIN Let another source duck this result and then recover.
INFLUENCE Let another source influence density or pitch.
ID SWAP Exchange note identities by an amount.
PHASE DRIFT Let the phase move gradually, with optional snap points.
ENV TPOSE / ENV OCTAVE / ENV SHIFT / ENV RATCHET Use an envelope to move the named target over time.
ENVELOPE CV1 / ENVELOPE CV2 Send an envelope to a CV output.
GLITCH SLICE Repeat small slices forward, backward, alternately, or randomly.
PLAY CONTROL Start or stop a selected playhead now or at a musical boundary.
DELAY Add step-timed repeats.
EVOLVE Gradually develop the pattern.
SLIDE Choose a linear, logarithmic, or exponential note slide.
RESET Jump back to the last note or loop start and replay the section a chosen number of times.
VEL SHAPE Turn note velocity into a MIDI CC curve for attack, cutoff, or another synth control.

Current DRUM Modifier types

DRUM offers the types that make sense for trigger parts:

RATCHET, SHIFT, MUTE, LFO, TIME WARP, PHASE, LOOP WINDOW, JUMP QUANTIZE, SCRUB, STUTTER, RHYTHM MASK, VEL SPREAD, DEGRADE, FRAGMENT, REORDER, SKIP, ACCENT, SIDECHAIN, INFLUENCE, PHASE DRIFT, ENV SHIFT, ENV RATCHET, ENVELOPE CV1, ENVELOPE CV2, GLITCH SLICE, PLAY CONTROL, DELAY, and RESET.

Current MODU Modifier types

MODU offers CV OFFSET, CV SCALE, CV INVERT, CV QUANTIZE, and CV WAVEFOLD. See the MODU chapter for their plain-language uses.

Practical examples

  • Add RATCHET only to the last snare of a four-bar phrase.
  • Set HARMONIZE to GLOBAL on Yellow while Orange keeps the original melody.
  • Use PLAY LOOPS 3 and REST LOOPS 1 to create a change that disappears every fourth loop.
  • Use VEL SHAPE to make harder-played notes open a filter through MIDI CC.
  • Use RESET at the end of a phrase for a controlled repeat before playback continues.
ADEPT Firmware 1.40Chapter 8 of 22
9

GROUPS

What it is

GROUPS puts several tracks under one performance switch. There are eight groups, G1 to G8, and a track can belong to more than one group.

A group has two separate ideas:

  • Membership decides which tracks belong together.
  • MODE decides what happens when the group is activated.

Build a group

  1. Open GROUPS.
  2. Push the joystick down to highlight the group block, then turn EncB to choose G1–G8.
  3. Push the joystick up to return to the track list, then turn EncB to choose a track.
  4. Press EncB to add or remove that track from the selected group.
  5. Press White to open the group settings.

Touching a track card mutes or unmutes the track. It does not change group membership.

Group settings

Use the joystick up/down to choose a row. Press EncB to edit it, turn EncB to change the value, then press EncB again to finish editing.

Row What it does
BACK Returns to the group screen.
GROUP Chooses G1–G8.
MODE MUTE makes activation mute the members. SOLO makes activation keep the members and mute the other available tracks.
XFADE Lets a Crossfade choice expand to the whole group.
TRANSITION Lets a Transition choice expand to the whole group.

Back on the main GROUPS screen, touch the group block to apply or release its MUTE/SOLO action.

Where groups are used

  • In Live Play, touching a track that belongs to a group brings the other available members of that group with it.
  • In Crossfade, XFADE can treat a group as one performance choice.
  • In Transition, TRANSITION can include all group members in a handoff.

Groups are designed as a live setup. Save the important track and performance state in the project, but be prepared to rebuild G1–G8 membership after loading.

ADEPT Firmware 1.40Chapter 9 of 22
10

XPLAY Overview

XPLAY contains six live-performance tools:

Card Use it for...
CONDUCTOR Changing harmony, phrase shape, fills, and musical energy.
TRANSITION Moving between projects or track sets over time.
CROSSFADE Blending tracks, Modifiers, or MIDI routes with the joystick.
LIVE PLAY Bringing tracks in and out immediately or at a loop boundary.
ARRANGE Playing a sequence of track scenes.
MIX Controlling velocity or MIDI CC with performance sliders.

Open XPLAY, turn EncB to select a card, then press White to open it. On Conductor, Crossfade, Transition, and Live Mix, hold White to open setup. Short-press White to close setup first, then press it again to leave the performance surface.

ADEPT Firmware 1.40Chapter 10 of 22
11

Conductor

What it is

Conductor changes the way a performance develops without rewriting the stored pattern. On KEYS tracks it can move notes to fit changing chords. On DRUM tracks it can change density and create fills or breaks without changing the drum notes. MODU tracks pass through unchanged.

Firmware 1.40 has CALL/RESPONSE, COMPOSER, and OFF.

Opening Conductor does not switch the engine on. It remains OFF until you choose a mode. If an engine was already running, opening the screen shows that current mode.

Turn it on

  1. Open XPLAY and choose CONDUCTOR.
  2. Turn EncA to choose CALL/RESPONSE, COMPOSER, or OFF.
  3. Hold White to open setup.
  4. Choose which tracks and coloured playheads Conductor may change, then hold White again to return to the performance screen.

Closing the Conductor screen does not turn an active engine off. Choose OFF when you want Conductor to stop changing playback.

CALL/RESPONSE

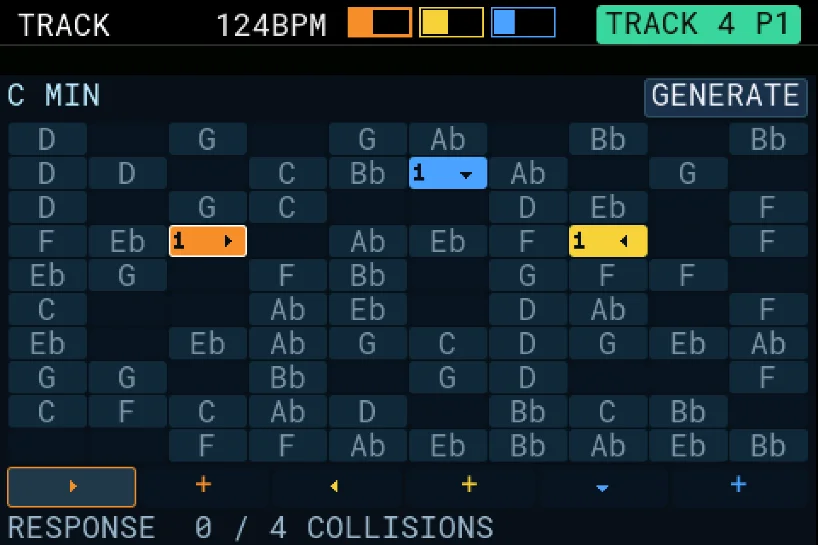
CALL/RESPONSE plays the original phrase as the call, then changes selected KEYS tracks for the response. Its main screen has four answer blocks, A1 to A4.

Each answer block stores three things:

Setting What it controls
LOOP Sets how many response loops use the block. OFF removes that block from the response sequence.
Answer shape Chooses UP, DOWN, NEAR, WIDE, or INVERT.
Drum action Chooses OFF, FILL, BREAK, or BOTH for the DRUM tracks assigned to that block.

Push the joystick left/right to select A1–A4. Push it up/down to choose the loop count, answer shape, or drum action inside that block, then turn EncB to change the highlighted value. Touching a block selects it; touching the selected block again moves to its next setting.

Touch a numbered track box to add or remove that track from the selected answer block. Press EncB to trigger that block's drum fill or break manually.

Shape Result
UP Moves the response to notes above the call.
DOWN Moves the response below the call.
NEAR Keeps the answer close to the original notes.
WIDE Makes a larger upward move.
INVERT Mirrors the movement around the musical home. The setup grid shortens this label to INV.

Use the CALL and RESP cells in setup to choose how many times each half repeats.

COMPOSER

COMPOSER develops the selected tracks through a set of performance stages. Its main screen has four cards:

Card What it controls
STAGE Moves between GROUND, MOTION, FLOW, LIFT, PEAK, and RELEASE.
TENSION / ANCHOR / VARY This is one shared card. TENSION controls how adventurous and active the chord movement can become. ANCHOR controls how strongly moved notes are pulled toward the current chord. VARY changes the end of the phrase with OFF, ECHO, WIDE, or FLIP.
CHANGES Chooses DRIFT, CYCLE, FALLING, RISING, or ORBIT as the direction of the chord movement.
KEY / SCALE Sets the musical key and scale. Press EncB to swap the card between KEY and SCALE.

Push the joystick left/right to select a card and turn EncB to change it. When the shared live card is selected, push the joystick up/down to choose TENSION, ANCHOR, or VARY.

Turn EncC, or touch one of the I to vii boxes, to choose the chord that Composer treats as home. Touch the large status line to move up one stage. Touch the selected STAGE card to enter RELEASE; touch it again to return.

Press EncB while a Composer card other than KEY/SCALE is selected to hold the current chord passage as a repeating loop. Press it again to release the loop. Long-press EncB to pause Conductor at its current point; long-press it again to continue.

Touch a numbered track box to add or remove that track from Composer.

The six stages are:

Stage Musical effect
GROUND Keeps the music at its chosen home.
MOTION Starts moving through other chords.
FLOW Changes chords more often.
LIFT Raises the KEYS parts by an octave and adds energy.
PEAK Uses the strongest movement and the selected PEAK treatment.
RELEASE Returns to the home chord and reduces the activity.

When QNT is on, a stage shown with > is waiting for the current loop to finish.

Conductor setup

Hold White to open the setup grid. Push the joystick up/down to change rows, left/right to change cells, and turn EncB to edit the selected cell.

To set the tracks and playheads, touch a track once to select it. Touch the selected track again to add or remove it. The three coloured boxes at the left control which playheads are used for that selected track.

Row Cells and values What they do
MODE CALL&RESP, COMPOSE, OFF Selects the Conductor mode.
RESPONSE UP, DOWN, NEAR, WIDE, INV; each is OFF or 1–8 loops Chooses which answer shapes are available and how long each one remains active.
REPEAT CALL, RESP; 1–8 repeats Sets how many times the call and response play before changing halves.
ENGINE PEAK: OFF, LIFT, SIMPLE, RESPONSE, WIDE Chooses the note treatment used at the PEAK stage.
QNT: ON or OFF ON waits for a loop boundary before applying live Conductor changes.
DRUM: ON or OFF Allows Conductor to create automatic drum fills.
FILL%: 0–100% Sets how much automatic filling is used.
FEEL DENS: 0–100% Sets the overall note density used by Conductor.
CAD: V, ii-V, IV-I, V-vi Chooses how Composer returns or moves into the next section.
CHANGE: DRIFT, CYCLE, FALLING, RISING, ORBIT Chooses the shape of the chord movement.
VARY: OFF, ECHO, WIDE, FLIP Chooses how the end of a phrase is changed.

Touch can also select a row or cell. Touch the selected cell again to move to its next value.

Conductor setup is saved with the project. The live Composer stage returns to GROUND after loading so a project does not reopen halfway through a rise or release.

ADEPT Firmware 1.40Chapter 11 of 22
12

Crossfade and Live Play

Crossfade

Crossfade uses the joystick to move between four corners. Each corner can hold a track and a Modifier. In MIDI MIX, each corner holds a MIDI or CC destination instead.

Hold White inside Crossfade to open setup. Use the joystick up/down to choose a row and turn EncB to change it. Start with QUAD to choose Q1–Q4, then set the track and Modifier for that corner. Choose BACK when finished.

TYPE Behaviour
ALL Keeps all four assigned tracks fully present. The joystick can still change the assigned Modifiers.
CENTER 0 The centre is silent. Move toward a corner to bring that corner in.
CENTER MIX The centre plays the full mix. Move toward a corner to favour it and reduce the others.
MIDI MIX Sends one selected source toward the destinations assigned to the four corners.

For normal Crossfade use:

  • QUAD chooses the corner you are editing.
  • TYPE chooses how the centre and corners behave.
  • TRACK assigns a track to that corner. Use -- when no track is needed.
  • MOD chooses a Modifier for that corner.
  • MOD ON turns that Modifier contribution on or off.
  • MOD PH chooses the Orange, Yellow, or Blue playhead affected by the Modifier.
  • The rows below MOD PH are the selected Modifier's own settings.

In MIDI MIX, choose one SOURCE, then edit Q1–Q4 and give each one a DEST. DEST CH changes or passes through the MIDI channel. DEST CC chooses the controller number for a CC destination. Sources are DIN1–3 IN, USB1–3 IN, CV IN, and DIN1–3 OUT. Destinations are DIN1–3 OUT and CC on DIN1–3.

Use Crossfade for a breakdown, a four-way arrangement blend, a live Modifier change, CV-to-CC control, or blending one MIDI source between several destinations.

Live Play

Live Play shows the 12 tracks in a performance grid.

Mode Behaviour
LIVE A touched track changes immediately.
LOOP The change waits for the next loop boundary while transport is running.

Touch the LIVE/LOOP badge to change mode. Touch a track cell to bring that track in or out. If the track belongs to a group, all available members of that group change with it.

When Arrange is currently running, Live Play edits the active Arrange scene. The screen reports ARRANGE LIVE; if a group was changed, it reports GROUP LIVE.

Use LIVE for immediate improvisation and LOOP for changes that land cleanly at the next loop.

ADEPT Firmware 1.40Chapter 12 of 22
13

Transition

Transition moves from one live setup to another over a chosen number of bars.

Hold White to open the Transition type chooser. Turn EncB to choose one of the two types, then press EncB to open it:

  • PROJECTS: move from the current setup to a saved project slot in the same bank.
  • TRACKS: fade one set of tracks out while another set fades in.

Project transition

  1. Turn EncA to choose a used target slot.
  2. Turn EncB to set 1–64 bars.
  3. Press EncA or touch START.
  4. Press EncA again to cancel. EncC moves progress in larger steps and EncD moves it in smaller steps when you want to control the transition by hand.

Project mode can gradually move the internal tempo toward the target project's saved BPM. When both keys are known, the screen also shows their relationship.

Track transition

The left grid is FROM; the right grid is TO.

  • A track only in FROM fades out.
  • A track only in TO fades in.
  • A track in both keeps playing.
  • A track in neither is left alone.

Use the joystick to move around the FROM and TO grids. EncB selects a track and pressing EncB adds or removes it from the active grid. EncA sets 1–64 bars; press EncA or touch START to start or cancel. EncC and EncD move the progress by hand. Track mode does not load a project or change tempo and key.

Use it to hand over from an intro to a full arrangement, swap a live band of tracks, or move between songs without an abrupt cut.

ADEPT Firmware 1.40Chapter 13 of 22
14

Live Mix

Live Mix provides 12 performance sliders. A slider can scale note velocity or send MIDI CC, and its movement can be recorded.

Hold White to open setup. Use the joystick up/down to choose a row and turn EncB to change it. Hold White again to return to the sliders.

Main controls

Control Job
EncB Select a slider.
EncA Select Orange, Yellow, or Blue for that slider.
EncC / EncD Change the slider value.
Touch a coloured block Select that playhead for the slider.
Touch a slider name Reset that slider to full and clear its recorded movement.
Touch REC OFF/ON Start or stop a slider recording take.
Hold White Open setup.

Setup rows

Row Purpose
SLIDER Choose S1–S12.
ASSIGN Choose the target track.
VEL ON controls note velocity; OFF makes the slider a MIDI CC control.
CC Choose the CC number when VEL is off.
ENC RATIO Choose the encoder's adjustment size.
REC SLIDER Arm or disarm slider recording.
REC LOOPS Set the length of the recorded movement.
LOCK Protect a slider from accidental movement.
CLEAR Clear recorded slider movement for one target or all sliders.

Use Live Mix for a velocity fade, filter sweep, send level, or repeatable live automation move.

ADEPT Firmware 1.40Chapter 14 of 22
15

Arrange

Arrange plays up to 12 scenes in order. Each scene stores which of the 12 tracks are active and how many times the scene repeats.

Build an arrangement

  1. Open XPLAY and choose ARRANGE.
  2. Select a scene column.
  3. Select track rows and turn their scene dots on or off.
  4. Set the repeat count at the top of the scene.
  5. Turn Arrange on.

Controls

Control Job
EncA turn Turn Arrange ON or OFF.
EncB turn Change the selected scene's repeat count.
EncC turn Move through track rows.
EncD turn Move through scene columns.
EncC or EncD press Toggle the selected track dot, or edit the repeat when the repeat row is selected.
Joystick Move through the grid; holding it repeats while this view owns the controls.

Use scenes for intro, verse, chorus, break, and outro, or for any ordered set of track combinations.

ADEPT Firmware 1.40Chapter 15 of 22
16

Projects and Naming

Project cards

Card What it does
PROJECT Shows the selected slot. Touch a used PROJECT card to clear that slot after confirmation.
SAVE Saves the current work into the selected slot.
LOAD Loads the selected used slot after confirmation.
NEW Starts a blank project after confirmation.

Projects are organised into banks and lettered slots. EncA selects the bank and EncB selects the slot.

Save safely

  1. Open PROJECTS.
  2. Select the bank and slot.
  3. Touch SAVE.
  4. If the slot is already used, read OVERWRITE SLOT? and choose YES only when you mean to replace it.

Other confirmations are CLEAR SLOT?, LOAD PROJECT?, and NEW PROJECT?.

Name a project

  1. Select the project slot in PROJECTS.
  2. Press White to open PROJECT NAME.
  3. Enter up to 11 characters and choose SAVE.

The project keyboard contains letters, numbers, SPACE, -, _, BACK, CLEAR, RANDOM, CANCEL, and SAVE. RANDOM creates a built-in name. A blank name cannot be saved.

What a project keeps

A project keeps the musical patterns and their important performance setup, including track/playhead settings, Swing, Track LFO, Cross Mod, Modifiers, MODU STATES, Router setup, Crossfade, Arrange, and Conductor choices.

G1–G8 group membership is a live setup and is not restored with the project.

ADEPT Firmware 1.40Chapter 16 of 22
17

MIDI Router

What it is

MIDI Router connects physical and USB MIDI sources to MIDI or CV destinations. It can filter a link, split note ranges, merge sources, and change a track's route on selected steps.

Short-press White to move through its three views:

  1. TRACKS
  2. WIRING
  3. Router Arrange, the step-routing grid

Hold White in WIRING to open MIDI FILTER for the selected link.

TRACKS view

TRACKS shows where each created track is currently being sent. Select a track with EncA, then read the P1/P2/P3 wires and channel numbers shown for it.

WIRING view

Sources on the left are DIN1–3 IN, USB1–3 IN, and CV IN. Destinations on the right are DIN1–3 OUT, USB1–3 OUT, and CV1/CV2 OUT.

Control Job
EncA turn Choose the source.
EncB turn Choose the destination.
EncA or EncB press Link or unlink the selected pair.
EncC or EncD press Show or hide a track's default-route browser.
EncC or EncD turn Change the track shown in that browser.
Hold White Open the filter for the selected linked pair.

A DIN socket set to DIN SYNC on SYSTEM is marked DINSYNC and cannot be used as a MIDI link until it is returned to MIDI mode.

MIDI FILTER

Row What it controls
CHANNEL All channels or one channel 1–16.
MESSAGE ALL, NOTES, NOTES+CC, VOICE, or NONE.
NOTES All notes or a useful note-range preset.
VELOCITY All velocities or a velocity-range preset.
CC All CC, none, or one CC number.
SYSTEM Allow or block MIDI Start/Stop.
MIDI SPLIT Turn note splitting on or off for two or three MIDI outputs already linked in WIRING.
SPLIT 1–3 Move the boundaries between the note ranges. The destination shown on each row comes from the WIRING links.
MERGE FILTER Choose which source's filter to edit when several sources feed one destination.

Use joystick up/down or EncA for rows and EncB for values. White closes the filter.

Router Arrange

This view adds step-based output or channel changes to a track and playhead. Rows are CHN, DIN1–3, USB1–3, CV1, and CV2.

Control Job
EncA turn / press Select a track / turn its step routing on or off.
EncB turn Edit CHN while the channel row is selected; otherwise select Orange, Yellow, or Blue.
EncB press Move to the next coloured playhead.
EncC turn / press Select a row / toggle the selected output or channel choice.
EncD turn / press Select a step / toggle the choice at that step.
Joystick Move through the grid.

Use this for a phrase that moves to a different MIDI output, a single step that changes channel, or a pattern that alternates between MIDI and CV destinations.

Router wiring, filters, splits, merges, and step routing are saved with the project.

ADEPT Firmware 1.40Chapter 17 of 22
18

System

Main settings

Open SYSTEM, move through the rows with the joystick up/down, and turn EncB to change the selected row. Press EncB on STORAGE or CV CAL to open it.

Setting Choices / purpose
CV1 / CV2 V/OCT, HZ/V, or 1.2V/OCT. Match the pitch standard used by the receiving instrument.
GATE1 / GATE2 V-TRIG, S-TRIG, or VOLCA 2PPQ. Match the trigger or clock input on the receiving device.
DIN1 / DIN2 / DIN3 MIDI, ROLAND 12, ROLAND 24, KORG 24, or KORG 48. Choose MIDI for notes and controllers; choose a clock format when that socket is being used for DIN sync.
BACKLIGHT Sets screen brightness.
STORAGE Shows ERASE. Press EncB and confirm YES to erase saved user data.
CV CAL Opens the guided CV1, CV2, and CV input calibration.

Erasing storage is destructive. Use it only when you intend to erase saved data. It also clears CV calibration.

CV calibration menu

Use the joystick up/down to choose an entry and press EncB to open it. White goes back without accepting the current step.

Entry What it does
CV1 TRACK Tunes CV1 OUT across eight A-note reference points.
CV2 TRACK Tunes CV2 OUT across eight A-note reference points.
CV IN LOOPBACK Calibrates CV IN automatically with a cable from CV1 OUT.
CV IN MANUAL Calibrates CV IN from a trusted external voltage source.
RESET ALL Returns all CV calibration to standard values.

Track a CV output

  1. Patch CV1 or CV2 OUT to the receiving synth and monitor it with a tuner.
  2. Choose CV1 TRACK or CV2 TRACK.
  3. For A0 through A7, use EncA for a large adjustment and EncB for a fine adjustment.
  4. Press EncB to capture each tuned point.
  5. After A7, check that the summary shows TRACKED.

Calibrate CV input by loopback

  1. Patch CV1 OUT to CV IN.
  2. Choose CV IN LOOPBACK.
  3. Press EncB to start and wait for completion.
  4. Check that CV IN shows CAL'D.

For manual input calibration, choose CV IN MANUAL and follow the displayed low and high voltage prompts. If INPUT UNSTABLE appears, check the source and cable, then try again.

ADEPT Firmware 1.40Chapter 18 of 22
19

Web Editor and Firmware Update

Connect ADEPT to the browser by USB MIDI and choose Connect ADEPT. Allow MIDI and SysEx access when the browser asks.

The web editor can read and change:

  • the project name and all 12 track names;
  • the selected playhead, CASCADE, and SEQUENTIAL;
  • PLAY MODE, DIRECTION, CLOCK DIV, CLOCK SRC, OUTPUT, CHANNEL, REC MODE, REC Q, INPUT, PASS THRU, HUMAN, MASTER, LOOP Q, and S/S FILTER for each playhead;
  • the CV pitch, gate, and DIN settings shown in its System panel.

The browser editor currently offers NORMAL, METRICAL, STOCHASTIC, and RANDOM in PLAY MODE. Choose CALL&RESP or COMPOSE on ADEPT itself.

Choose Save Metadata To ADEPT after sending changes; sending a field alone does not make it permanent. Exported project JSON contains the names, playhead settings, and System-panel settings. Importing a JSON file fills the editor first so you can review it before sending it to ADEPT.

For a firmware update:

  1. Open the editor in Chrome or Edge and allow MIDI access when asked.
  2. Keep ADEPT connected directly by USB.
  3. Choose the ADEPT firmware .bin file in the updater.
  4. Let the updater check the file and put ADEPT into update mode.
  5. Leave the browser open and do not disconnect USB until ADEPT has restarted and the updater reports completion.
ADEPT Firmware 1.40Chapter 19 of 22
20

Practical Recipes

A pattern that changes every four loops

  1. Make a normal KEYS or DRUM pattern.
  2. Set one extra step to 4:4.
  3. Lower its PROB if it should happen only sometimes on that fourth pass.
  4. Add RATCHET or ACCENT to the same step for a stronger turnaround.

Three parts from one track

  1. Put the main notes on one KEYS track.
  2. Give Orange 16 steps, Yellow 12, and Blue 7.
  3. Change their DIRECTION or CLOCK DIV values.
  4. Route them to different outputs or channels where required.

Intro to full arrangement

  1. Open Transition in TRACKS mode.
  2. Put the intro tracks in FROM.
  3. Put the full arrangement tracks in TO; include any parts that should continue in both.
  4. Choose the number of bars and start.

Call and answer performance

  1. Open Conductor and choose CALL/RESPONSE with EncA.
  2. Hold White. Choose which answer shapes are available, set CALL and RESP repeats, and allow the required tracks and coloured playheads.
  3. Leave setup and select answer block A1, A2, A3, or A4 with the joystick.
  4. Set that block's loop count, answer shape, and drum action. Touch track boxes to add or remove them from that block.
  5. Press EncB when you want the selected block's fill or break immediately.

Arrange a short song

  1. Scene 1: drums and bass, repeat 4.
  2. Scene 2: add the main KEYS track, repeat 8.
  3. Scene 3: remove the bass and add a fill track, repeat 2.
  4. Scene 4: turn on the full set of tracks, repeat 8.
  5. Turn Arrange ON.
ADEPT Firmware 1.40Chapter 20 of 22
21

Current Menu Reference

This section is for quick checking after you already know the feature.

TRACK rows by type

KEYS DRUM MODU
PLAYHEAD PLAYHEAD PLAYHEAD
LENGTH LENGTH LENGTH
SWING SWING LFO MOD
CONDITION CONDITION MODE
DYNAMICS DRUM MAP STATES
LFO MOD DYNAMICS
CROSS MOD LFO MOD
NOTE SHIFT NOTE SHIFT

Playhead menu order

BACK, PLAYHEAD, PLAY MODE, DIRECTION, CLOCK DIV, CLOCK SRC, OUTPUT, CHANNEL, REC MODE, REC Q, INPUT, REC LOOPS, PASS THRU, HUMAN, NOTE DIM, FADE, MASTER, LOOP Q, CASCADE, SEQUENTIAL, S/S FILTER, SCROLL/SPLIT, STEP NUMS, CLEAR.

Generator rows

  • KEYS: GENERATE, ROLE, VOICES, SCALE, DENSITY, VARIANT, NEXT VARI, VARI LOOP, HIGH NOTE, LOW NOTE, PLAY LOOPS, REST LOOPS, LOOP OFFSET, NOTE SHIFT.
  • DRUM: GENERATE, STYLE, DENSITY, VARIANT, NEXT VARI, VARI LOOP.
  • MODU: GENERATE, MODE, optional ENV, AMPLITUDE, OFFSET, SMOOTH, CURVE, CYCLE, PHASE, VARIANT.

GROUPS settings

BACK, GROUP, MODE, XFADE, TRANSITION.

XPLAY card order

CONDUCTOR, TRANSITION, CROSSFADE, LIVE PLAY, ARRANGE, MIX.

Conductor setup rows

MODE, RESPONSE, REPEAT, ENGINE, FEEL.

Live Mix setup rows

SLIDER, ASSIGN, VEL, CC, ENC RATIO, REC SLIDER, REC LOOPS, LOCK, CLEAR.

MIDI FILTER rows

CHANNEL, MESSAGE, NOTES, VELOCITY, CC, SYSTEM, MIDI SPLIT, SPLIT 1, SPLIT 2, SPLIT 3, MERGE FILTER.

Crossfade setup rows

  • Normal: BACK, QUAD, TYPE, TRACK, MOD, MOD ON, MOD PH, followed by the selected Modifier's settings.
  • MIDI MIX: BACK, QUAD, TYPE, SOURCE, DEST, DEST CH, DEST CC.

SYSTEM rows

CV1, CV2, GATE1, GATE2, DIN1, DIN2, DIN3, BACKLIGHT, STORAGE, CV CAL.

Piano Roll zoom

  • Hold EncD and turn: change the number of visible steps.
  • Hold EncC and turn: change the number of visible note or drum rows.
  • Press EncC and EncD together: fit the roll around the material or return to the normal view.
  • For patterns longer than 16 steps, SCROLL follows the playhead and SPLIT switches between fixed pages 1–16 and 17–32.
ADEPT Firmware 1.40Chapter 21 of 22
22

Troubleshooting

Problem What to check
A track is silent Check its mute, the coloured playhead, output, channel, GROUPS mode, Live Play, Arrange scene, Crossfade weight, and Transition state.
Recording captures nothing Check that recording is active and that INPUT and CHANNEL match the source. For a MODU curve coming from CV IN, set INPUT to CV.
PASS THRU is on but nothing is heard Check INPUT, CHANNEL, OUTPUT, the physical cable, and whether that DIN socket is set to MIDI rather than DIN SYNC.
A condition never plays Try --- first, then check the condition's loop, Fill, neighbour, or Modifier source. Remember that PROB is checked afterwards.
MODU cannot be drawn Start recording on that coloured MODU row before touching the curve.
MODU changes the sound but the picture is still MODE may be FREEZE; the output continues even when the picture is held.
Generator shows STOP TO GEN Stop transport and press GENERATE again.
Conductor does nothing after opening Opening the surface does not enable it. Turn EncA to CALL/RESPONSE or COMPOSER, then enrol tracks/playheads in setup.
MIDI Router will not create a link Check that the selected source and destination are valid and that a DIN socket is not reserved for DIN SYNC.
A project name will not save The name cannot be blank.
CV pitch is inaccurate Match the pitch standard in SYSTEM, then run CV output tracking for the connected synth.

When troubleshooting, start with the simplest path: one unmuted track, one running playhead, condition ---, probability full, one known output, and no active group or XPLAY performance layer. Add the other features back one at a time.

ADEPT Firmware 1.40Chapter 22 of 22